
You don't need to be a trained florist to create beautiful flower arrangements. With a few basic tools, some simple design principles, and about 30 minutes of your time, you can put together something genuinely stunning. This guide walks you through everything from choosing your flowers to perfecting your technique, with practical tips used by professional florists that translate perfectly into a home setting.
Whether you're making a centerpiece for a dinner party, a gift for a friend, or simply beautifying your own living room, these steps will help you get professional results every single time.
What You'll Need
Before you begin, gather your supplies. You don't need expensive equipment. Most of what you need you probably already own:
- 7–12 stems of flowers (3–5 focal, 3–5 secondary, 2–3 filler)
- 2–3 stems of greenery (eucalyptus, Italian ruscus, or fern)
- A clean vase (glass or ceramic, 8–12 inches tall for most arrangements)
- Sharp floral scissors or kitchen scissors
- Flower food sachet (or make your own: 1 tbsp sugar + 1 tbsp white vinegar per liter of water)
- Floral tape or rubber bands (optional, helps hold stems in place)
- A spray bottle of water (for misting during the process)
A few notes on tools: dull scissors are the enemy of flower arrangements. They crush stems rather than cutting cleanly, which blocks water uptake and shortens vase life dramatically. If you don't have sharp scissors, invest in a dedicated pair of floral shears they cost under $15 and make an enormous difference.
Understanding the Three Layers of a Flower Arrangement
Every professional flower arrangement, from a simple grocery store bunch to an elaborate event centerpiece, is built on the same three-layer structure:
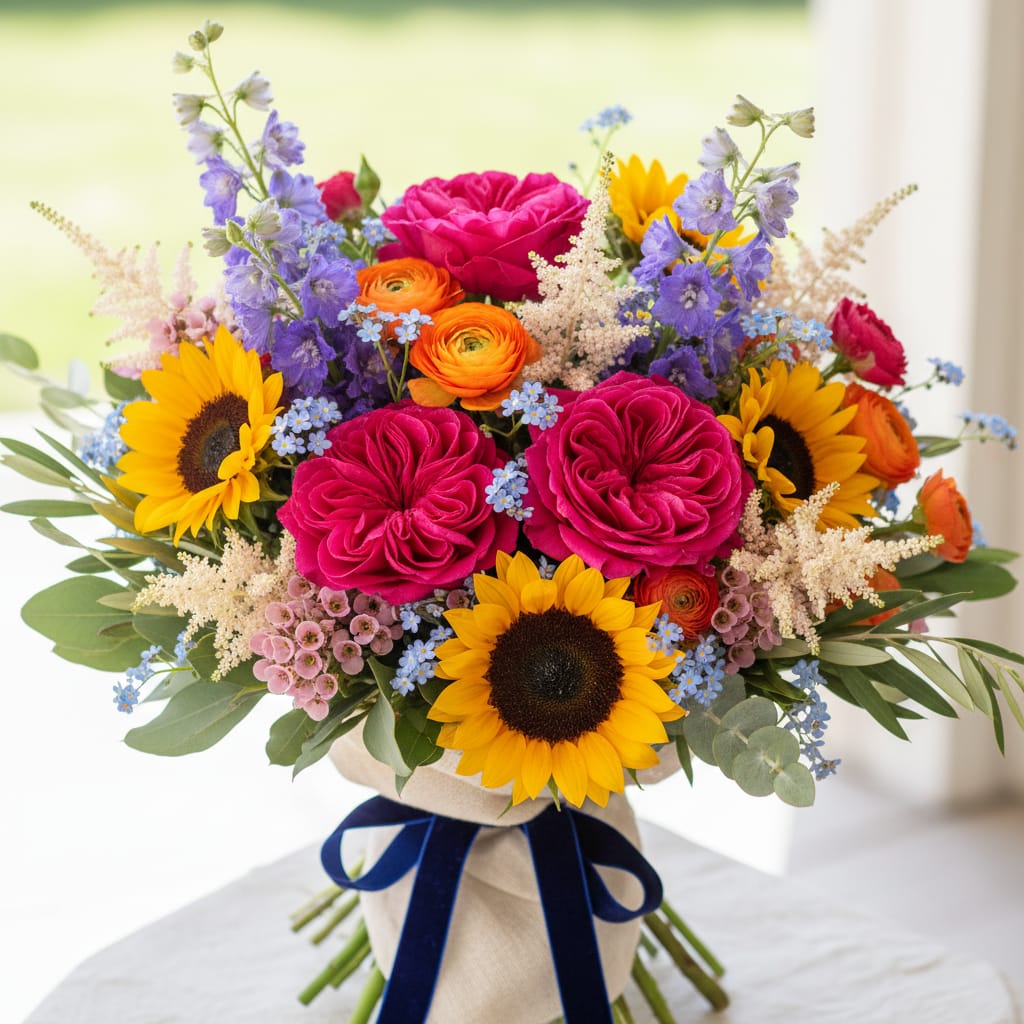
Focal flowers are your stars. These are your largest, most visually striking blooms roses, sunflowers, peonies, dahlias, or gerberas. They catch the eye first and anchor the arrangement.
Secondary flowers provide volume and colour support. Spray roses, carnations, alstroemeria, and lisianthus are excellent secondary choices. They fill the space between focal flowers and add visual depth.
Filler and greenery creates the foundation and softens the whole design. Baby's breath (gypsophila), wax flower, eucalyptus, fern, and leafy branches fall into this category. Greenery especially transforms an arrangement from "bunch of flowers in a vase" to something that looks deliberately designed.
When you shop for flowers, aim for this rough ratio: 30% focal, 40% secondary, 30% filler/greenery.
The Design Principles That Make the Difference
Before you pick up a single stem, understanding a few core principles will save you from common beginner mistakes.
Colour theory for flower arrangements: Stick to 2–3 colours maximum for a beginner arrangement. More colours create visual chaos rather than beauty. The most foolproof combinations are: white + soft green + one accent colour (pink, peach, or coral); all one colour in varying shades (all-white, all-pink gradient); or complementary colours from opposite sides of the colour wheel (orange + blue/purple, yellow + violet).
The odd-number rule: Odd numbers of focal flowers (3, 5, 7) look more natural and dynamic than even numbers. Two roses side by side creates tension; three roses create movement. This applies to the number of different flower varieties too: three types of flowers is more visually interesting than two or four.
Vary your heights: Place taller stems at the back and shorter ones at the front and sides, creating a domed, naturally organic shape. Every stem tip should be visible from some angle.
Create texture contrast: Mix smooth, polished flowers (roses, tulips) with textured, layered ones (dahlias, peonies, ranunculus). This contrast makes the arrangement feel rich and complex even with a small number of stems.
Step-by-Step: Your First DIY Arrangement
Step 1: Prepare Your Flowers and Vase
Start by cleaning your vase thoroughly with hot soapy water. Fill it two-thirds with fresh, lukewarm water (not cold warm water is absorbed more readily). Add your flower food or DIY mix.
Strip all leaves from the lower one-third of every stem before placing them in water. Submerged leaves rot rapidly, releasing bacteria that cut vase life in half.
Step 2: Trim All Stems at a 45-Degree Angle
Using your sharpest scissors, cut each stem at a 45-degree angle, removing 2–3 cm from the base. Do this under running water or submerge the stem ends in a bowl of water as you cut this prevents air bubbles from entering the stem and blocking water uptake.
Trim each stem to a slightly different length before arranging. This variation is what creates the natural, organic look rather than a flat-topped bunch.
Step 3: Build Your Greenery Framework First
Place your greenery stems into the vase first, fanning them out in a loose, asymmetric arrangement. This creates a natural framework that will hold your flowers in position and fill the visual gaps between blooms.
Eucalyptus and Italian ruscus are the most versatile greenery choices for beginners. They're available at most supermarkets and florists, last well in water, and provide an elegant neutral base for any colour combination.
Step 4: Place Your Focal Flowers
Now add your focal flowers one by one, rotating the vase as you go so you're viewing from all angles. Space them out evenly resist the temptation to cluster them all together. The space between focal flowers is where your secondary blooms and filler will live.
Aim for focal flowers at three different height levels: high, medium, and low. This creates depth and movement in the finished arrangement.
Step 5: Fill with Secondary Flowers
Add your secondary blooms into the gaps between focal flowers. These should generally sit slightly lower than your focal flowers, nestling in around them to create volume and fullness.
Keep rotating the vase and standing back to assess. The most common beginner mistake at this stage is adding too many stems to one side. The arrangement should look roughly even when viewed from all angles.
Step 6: Add Filler and Final Greenery
Wax flower, baby's breath, or additional eucalyptus sprays go in last, filling any remaining gaps and softening the overall silhouette. Filler flowers are what give arrangements that professionally "finished" quality they're small but their impact is significant.
Step 7: Final Assessment and Trim
Step back at least one meter and view the arrangement critically. Look for: any stems sticking up awkwardly above the general dome shape; any bare patches needing a filler stem; and balance does one side look heavier than the other?
Make final trims and adjustments, then mist the petals lightly with your spray bottle. This keeps them hydrated during display and gives the finished arrangement a fresh, dewy quality.
The Best Flower Combinations for Beginners
If you're not sure what to buy, these combinations are virtually foolproof:
Classic Romantic: Red or blush roses (focal) + spray roses (secondary) + eucalyptus (greenery). Works for anniversaries, Valentine's Day, apologies.
Spring Cheer: Yellow tulips (focal) + orange gerberas (secondary) + Italian ruscus (greenery). Works for birthdays, congratulations, spring gifting.
Elegant White: White lilies (focal) + white carnations (secondary) + white wax flower + dark green ruscus. Works for sympathy, formal events, modern interiors.
Wild Garden: Peonies (focal) + ranunculus (secondary) + sweet peas (filler) + loose greenery. Works for weddings, outdoor events, romantic occasions.
How to Make Your Arrangement Last Longer
Once your arrangement is complete, placement matters enormously for longevity. Keep it away from direct sunlight, heating vents, and fruit bowls (ripening fruit emits ethylene gas which accelerates petal wilting). The coolest room in your home is ideal.
Change the water every two days and re-trim the stems by 1 cm each time. Remove any blooms that begin to fade before they affect the others. A well-maintained DIY arrangement should last 7–12 days depending on the flowers used.

Seasonal Flower Buying Guide
The most cost-effective DIY arrangements are built around seasonal flowers. Here's a quick guide:
Spring (March–May): Tulips, peonies, ranunculus, sweet peas, lilacs, daffodils.
Summer (June–August): Sunflowers, dahlias, gerberas, zinnias, hydrangeas, lavender.
Fall (September–November): Dahlias, chrysanthemums, marigolds, dried flowers, hypericum berries.
Winter (December–February): Roses, carnations, amaryllis, poinsettia, hellebores.
Buying in-season flowers from a verified local florist means fresher flowers at lower prices the two biggest wins for a home arranger.
Frequently Asked Questions
Quick answers to common questions

